 网硕互联帮助中心
目录
一、安装zookeeper
二、zookeeper相关配置
三、zookeeper启动
四、zookeeper群起脚本
备注:没有特别说明的命令默认在hadoop102上执行,其中的“其它主机”是指hadoop103和hadoop104
一、安装zookeeper
1.将zookeeper安装拖到/opt/software目录下
zookeeper安装包:01-学习笔记尚硅谷数仓搭建-基础Linux环境搭建(使用3台主机模拟Hadoop集群)-CSDN博客
在资源中的5.zookeeper下
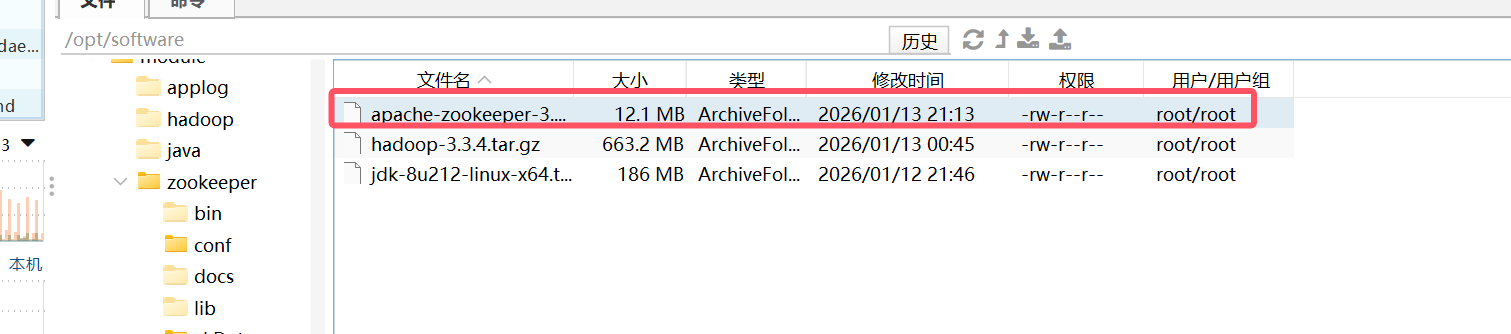
2.将安装包解压
cd /opt/software
tar -zxvf apache-zookeeper-3.7.1-bin.tar.gz -C /opt/module/
3.重命名zookeeper
cd /opt/module
mv apache-zookeeper-3.7.1-bin/ zookeeper
4.创建zookeeper服务器的id
cd /opt/module/zookeeper
mkdir zkData
vim myid
编写下面内容:
2
对就一个2,是给服务器的编号
二、zookeeper相关配置
1.重命名配置文件及修改资源路径
cd /opt/module/zookeeper/conf
mv zoo_sample.cfg zoo.cfg
vim zoo.cfg
将dataDir后面修改为:
dataDir=/opt/module/zookeeper/zkData
并增加下面内容:
##############################cluster######################### server.2=hadoop102:2888:3888 server.3=hadoop103:2888:3888 server.4=hadoop104:2888:3888
修改后完整代码:
# The number of milliseconds of each tick
tickTime=2000
# The number of ticks that the initial
# synchronization phase can take
initLimit=10
# The number of ticks that can pass between
# sending a request and getting an acknowledgement
syncLimit=5
# the directory where the snapshot is stored.
# do not use /tmp for storage, /tmp here is just
# example sakes.
dataDir=/opt/module/zookeeper/zkData
# the port at which the clients will connect
clientPort=2181
# the maximum number of client connections.
# increase this if you need to handle more clients
#maxClientCnxns=60
#
# Be sure to read the maintenance section of the
# administrator guide before turning on autopurge.
#
# http://zookeeper.apache.org/doc/current/zookeeperAdmin.html#sc_maintenance
#
# The number of snapshots to retain in dataDir
#autopurge.snapRetainCount=3
# Purge task interval in hours
# Set to "0" to disable auto purge feature
#autopurge.purgeInterval=1
## Metrics Providers
#
# https://prometheus.io Metrics Exporter
#metricsProvider.className=org.apache.zookeeper.metrics.prometheus.PrometheusMetricsProvider
#metricsProvider.httpPort=7000
#metricsProvider.exportJvmInfo=true
##############################cluster#########################
server.2=hadoop102:2888:3888
server.3=hadoop103:2888:3888
server.4=hadoop104:2888:3888
2.将修改后的zookeeper及相关配置分发到其它主机,输入下面命令:
cd /opt/module
xsync zookeeper/
3.修改myid
分发完成后,在hadoop103、hadoop104输入下面命令
cd /opt/module/zookeeper/zkData/
vim myid
将原来的2分别修改为3、4,对应每个服务器id
三、zookeeper启动
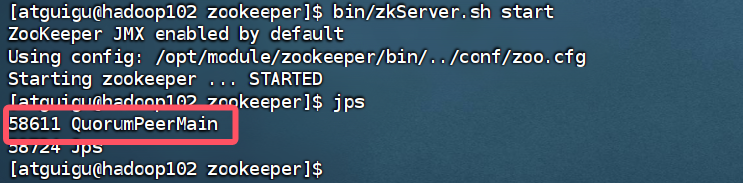
在3台主机分别输入下面命令启动zookeeper并查看进程
cd /opt/module/zookeeper
bin/zkServer.sh start
jps
如图,查看时有QuorumPeerMain进程,证明启动成功
四、zookeeper群起脚本
输入下面命令创建脚本
cd /home/atguigu/bin
vim zk.sh
填写下面内容后保存
#!/bin/bash
case $1 in
"start"){
for i in hadoop102 hadoop103 hadoop104
do
echo — zookeeper $i 启动 —
ssh $i "/opt/module/zookeeper/bin/zkServer.sh start"
done
};;
"stop"){
for i in hadoop102 hadoop103 hadoop104
do
echo — zookeeper $i 停止 —
ssh $i "/opt/module/zookeeper/bin/zkServer.sh stop"
done
};;
"status"){
for i in hadoop102 hadoop103 hadoop104
do
echo — zookeeper $i 状态 —
ssh $i "/opt/module/zookeeper/bin/zkServer.sh status"
done
};;
esac
输入下面命令启动脚本
# 启动集群
zk.sh start
# 关闭集群
zk.sh stop
# 查看集群状态
zk.sh status


评论前必须登录!
注册