 网硕互联帮助中心
一、图片旋转
'''图片旋转'''
import cv2
import numpy as np
#第一种方法用numpy实现
img= cv2.imread('')
rotated_img1=np.rot90(img,k=-1)#旋转90度,-1是顺时针旋转,1为逆时针旋转
rotated_img2=np.rot90(img,k=1)
cv2.imshow('yuantu',img)
cv2.imshow('image1shun',rotated_img1)
cv2.imshow('image2ni',rotated_img2)
cv2.waitKey(0)
cv2.destroyAllWindows()
#第二种用opencv
rotated_img=cv2.rotate(img,cv2.ROTATE_90_CLOCKWISE)#顺时针90度
rotated_img2=cv2.rotate(img,cv2.ROTATE_90_COUNTERCLOCKWISE)#逆时针90度
rotated_img3=cv2.rotate(img,cv2.ROTATE_180)#旋转180度
cv2.imshow('shun90',rotated_img)
cv2.imshow('ni90',rotated_img2)
cv2.imshow('180',rotated_img3)
cv2.waitKey(0)
二、模版匹配
'''模版与多个对象匹配'''
import cv2
import numpy as np
img_rgb=cv2.imread('')
img_gray=cv2.cvtColor(img_rgb,cv2.COLOR_BGR2GRAY)
template=cv2.imread('')
h,w=template.shape[:2]
#使用模版匹配方法cv2.matchTemplate,进行模板匹配
res=cv2.matchTemplate(img_gray,template,cv2.TM_CCOEFF_NORMED)
#设定匹配阈值
threshold=0.9
#获取匹配结果中所有符合阈值的点坐标
loc=np.where(res >= threshold)
#print(loc)
#遍历所有匹配点
for pt in zip(*loc[::-1]):
#在原图上绘制匹配区域的矩形框
cv2.rectangle(img_rgb,(pt[0]+w,pt[1]+h),(0,0,255),1)
cv2.imshow('img',img_rgb)
cv2.waitKey(0)
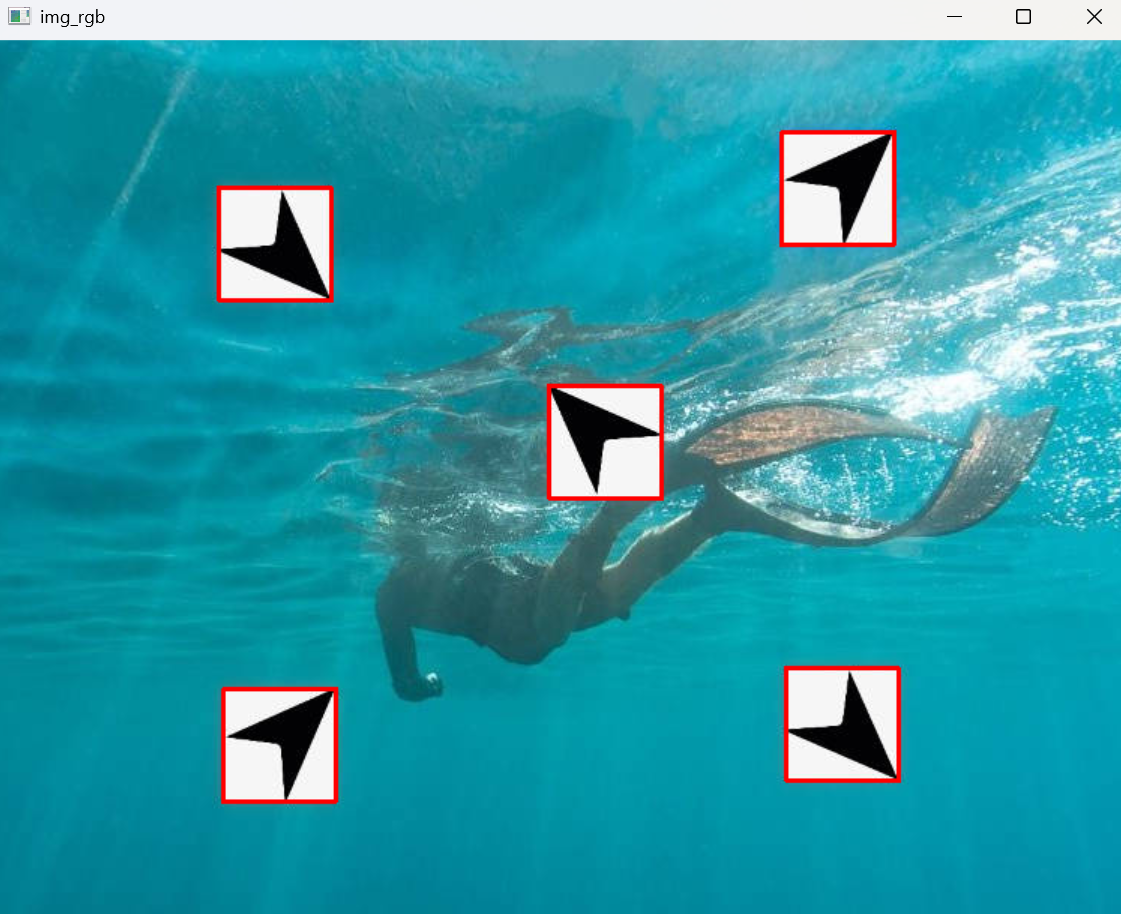
三、框选图片目标
利用上面图片旋转和模板匹配
template: 需要进行框选的图片:
import cv2
import numpy as np
def pipei(img_rgb,template):
img_gray=cv2.cvtColor(img_rgb,cv2.COLOR_BGR2GRAY)
h,w=template.shape[:2]
res=cv2.matchTemplate(img_gray,template,cv2.TM_CCOEFF_NORMED)
threshold=0.9
loc=np.where(res >= threshold)
for pt in zip(*loc[::-1]):
cv2.rectangle(img_rgb,pt,(pt[0]+w,pt[1]+h),(0,0,255),1)
return img_rgb
img_rgb=cv2.imread('yuantu1.jpg')
template=cv2.imread('jiantou.jpg',0)
template2=np.rot90(template,k=-1)
template3=np.rot90(template,k=1)
img_rgb=pipei(img_rgb,template)
img_rgb=pipei(img_rgb,template2)
img_rgb=pipei(img_rgb,template3)
cv2.imshow('img_rgb',img_rgb)
cv2.waitKey(0)
结果:
四、银行卡号识别
1.导入模块
import numpy as np
import argparse
import cv2
import myutils
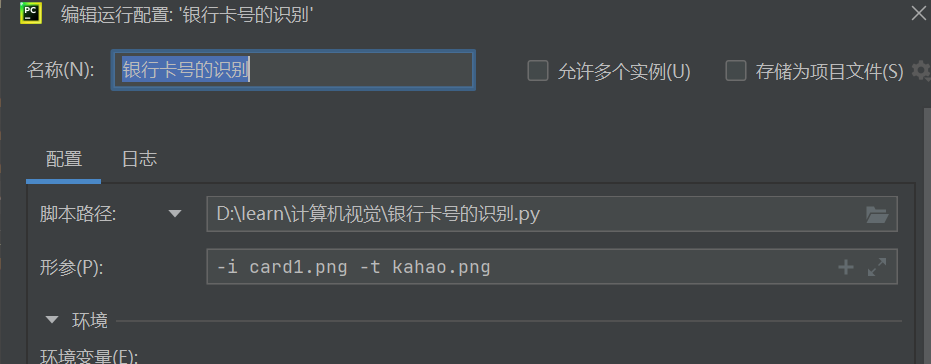
2.设置参数
在上一篇视觉博客中提到过的传入参数的方法这里我们设置两个参数,一个是传入的照片,一个是识别模版
传入的照片: 识别模板:
识别模板: 
为了方便这里我们设定义一个函数用来展示图片的
#设置参数
ap=argparse.ArgumentParser()
ap.add_argument('-i','–image',required=True,help='path to input image')
ap.add_argument('-t','–template',required=True,help='path to template OCA-A image')
args=vars(ap.parse_args())
def cv_show(name,img):
cv2.imshow(name,img)
cv2.waitKey(0)
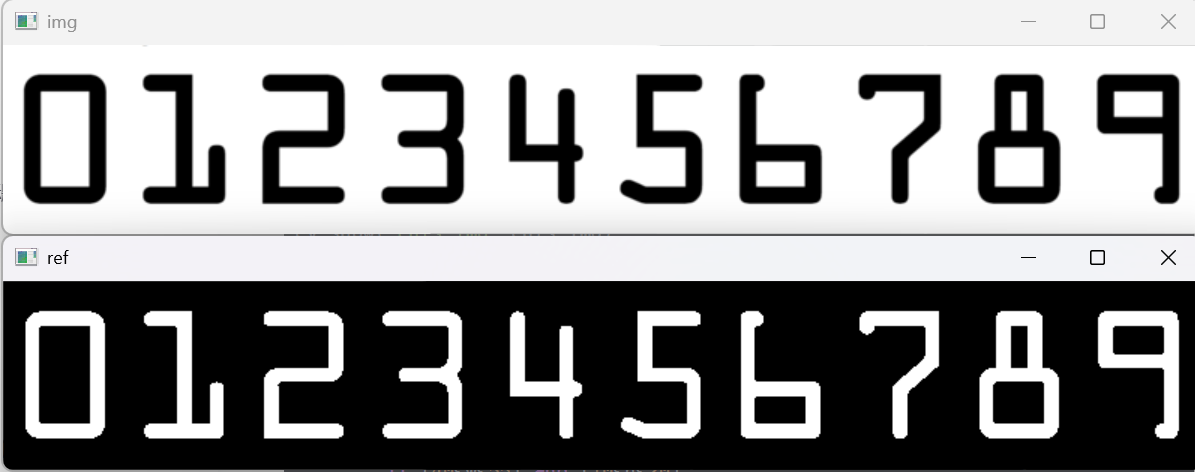
3.轮廓获取
对模板中每歌数字轮廓进行获取,检测到轮廓,ref输入图像(必须是二值图),
cv2.RETR_EXTERNAL(轮廓检索模式:只检测最外层轮廓),
cv2.CHAIN_APPROX_SIMPLE (轮廓近似方法:压缩水平/垂直/对角线方向点)。
'''————母版图像中数字的定位处理————-'''
img=cv2.imread(args['template'])#读取模板图
cv_show('img',img)
ref=cv2.cvtColor(img,cv2.COLOR_BGR2GRAY)#转为灰度图
cv_show('ref',ref)
ref=cv2.threshold(ref,10,255,cv2.THRESH_BINARY_INV)[1]#二值化并反色,达到黑底白字效果
cv_show('ref',ref)
#轮廓检测与排序
_,refCnts,hierarchy=cv2.findContours(ref,cv2.RETR_EXTERNAL,cv2.CHAIN_APPROX_SIMPLE)#检测轮廓
cv2.drawContours(img,refCnts,-1,(0,0,255),3)#绘制轮廓
cv_show('refCnts',img)
refCnts=myutils.sort_contours(refCnts,method='left-to-right')[0]#从左到右排列
digits={}#字典存储数字模板
for (i,c) in enumerate(refCnts):
(x,y,w,h)=cv2.boundingRect(c)#获取轮廓外接矩形
roi=ref[y:y+h,x:x+w]#裁剪出单个数字
roi=cv2.resize(roi,(57,88))#统一尺寸为57×88像素
cv_show('ro ',roi)
digits[i]=roi#按照顺序存入字典,0——>'0',1——>'1'……
print(digits)#打印字典:{0:数字0的矩阵,1::数字1的矩阵,……,9:数字9的矩阵

将0-9像素矩阵对应到具体的数字,构造为字典存放在digists当中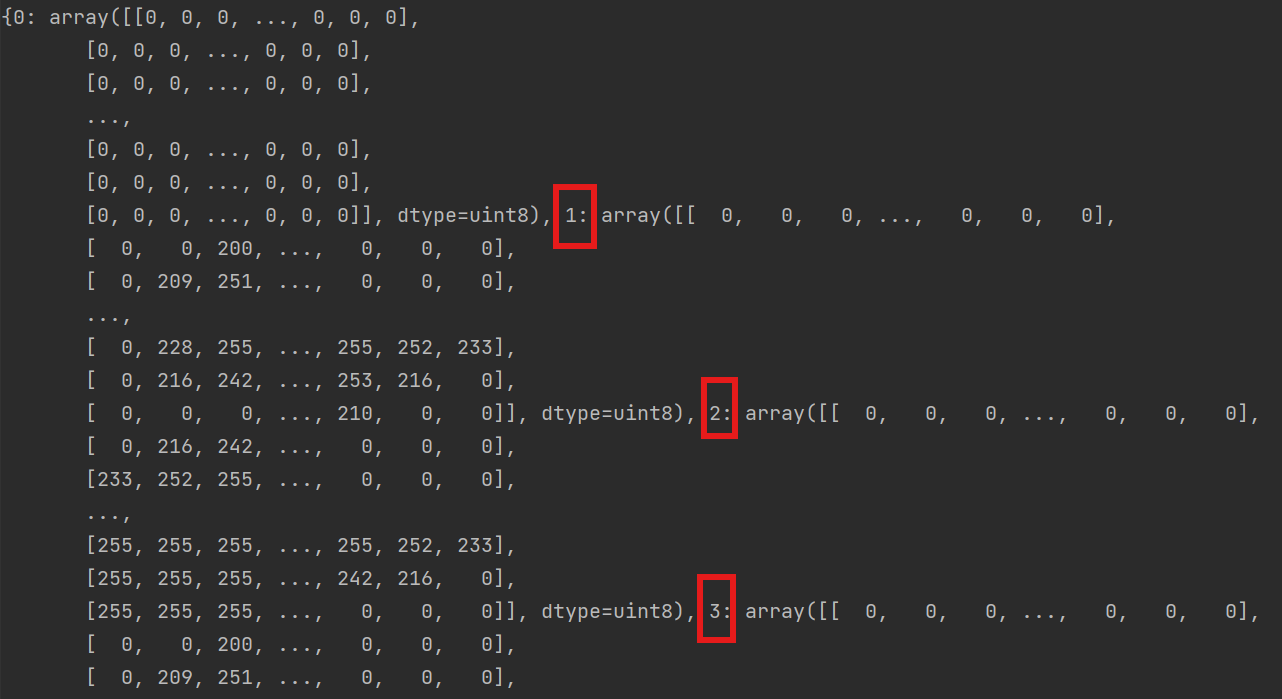
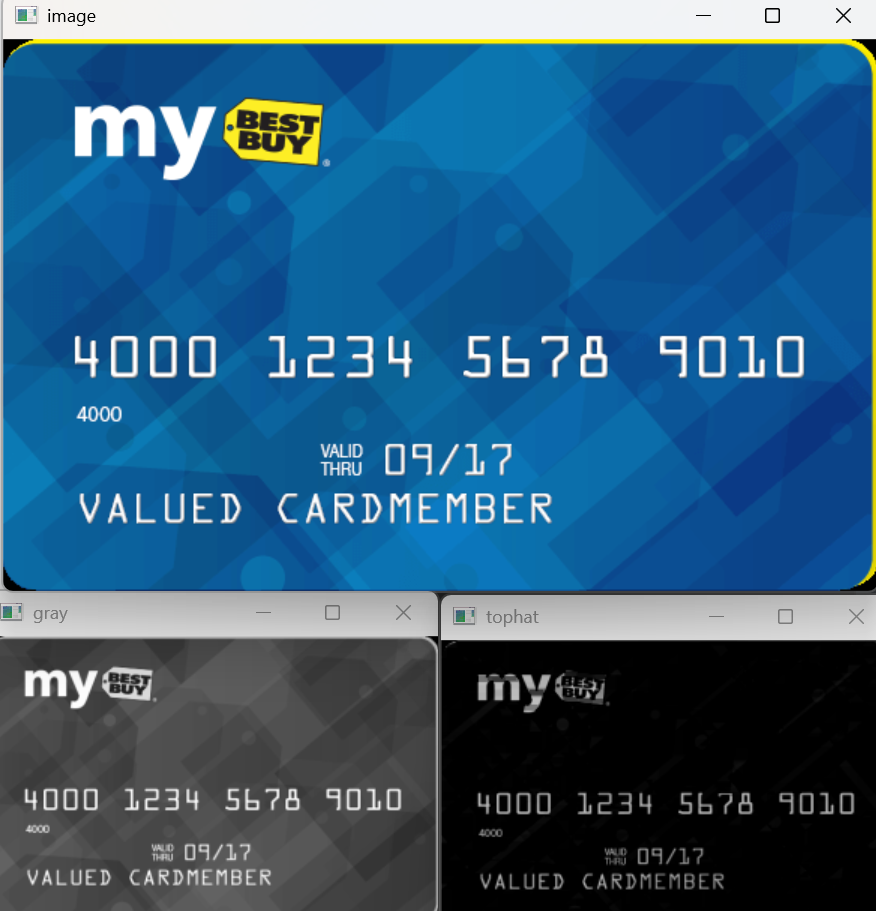
4.银行卡图像处理
这里使用顶帽,忽略掉卡上一些小细节,凸显数字
'''——————信用卡的图像处理———–'''
#读取输入的图像,预处理
image=cv2.imread(r'card1.png')
cv_show('image',image)
image=myutils.resize(image,width=300)#设置图像大小
gray=cv2.cvtColor(image,cv2.COLOR_BGR2GRAY)
cv_show('gray',gray)
#顶帽处理,突出图像中的亮细节,清楚背景图,因为背景图颜色变化小,不被腐蚀掉
rectKernel=cv2.getStructuringElement(cv2.MORPH_RECT,(9,3))
sqKernel=cv2.getStructuringElement(cv2.MORPH_RECT,(5,5))
tophat=cv2.morphologyEx(gray,cv2.MORPH_TOPHAT,rectKernel)
# open=cv2.morphologyEx(gray,cv2.MORPH_OPEN,rectKernel)
# cv_show('open',open)
cv_show('tophat',tophat)
读取输入的图像,也就是card1.png,灰度图处理,处理掉卡背景的杂质
5.找数字边框
这块是主要核心,如果我们处理图片不当就会影响我们的输出结果
'''————-找到数字边框————————–'''
#通过闭操作(先膨胀后腐蚀)将数字连在一起
closex=cv2.morphologyEx(tophat,cv2.MORPH_CLOSE,rectKernel)
cv_show('close1',closex)
#Tjresh_otsu会自动寻找合适的阈值,适合双峰,需要把阈值参数设置为0
thresh=cv2.threshold(closex,0,255,cv2.THRESH_BINARY | cv2.THRESH_OTSU)[1]
cv_show('thresh',thresh)
#闭操作
thresh=cv2.morphologyEx(thresh,cv2.MORPH_CLOSE,sqKernel)
cv_show('close2',thresh)
#计算轮廓
_,cnts,h=cv2.findContours(thresh.copy(),cv2.RETR_EXTERNAL,cv2.CHAIN_APPROX_SIMPLE)
cnts_img=image.copy()
cv2.drawContours(cnts_img,cnts,-1,(0,0,255),3)
cv_show('cnts_img',cnts_img)
#遍历轮廓,找到数字部分像素区域
locs=[]
for c in cnts:
(x,y,w,h)=cv2.boundingRect(c)
ar=w / float(h)
#选择合适的区域,根据实际任务
if 2.5 < ar <4.0:
if (40<w<55) and (10<h<20):
locs.append((x,y,w,h))
#将符合的轮廓从左到右排列
locs=sorted(locs,key=lambda x: x[0])
print(locs)
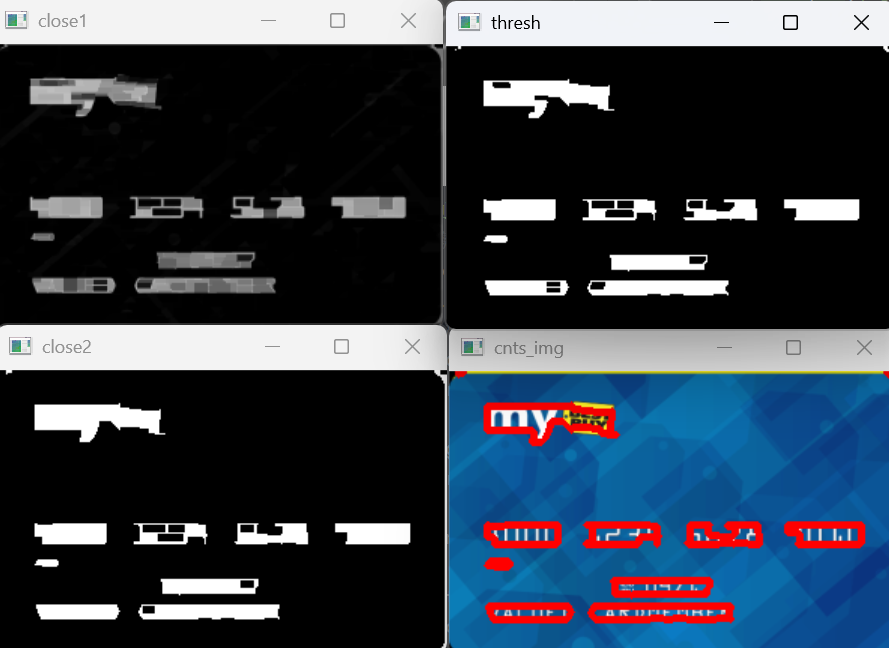
这里筛选出我们需要的轮廓,长宽等是根据实际情况估计的可以多次修改筛选到对应的卡号轮廓,这里我们得到四个边框是因为,银行卡号是四块数字分开的
![]()
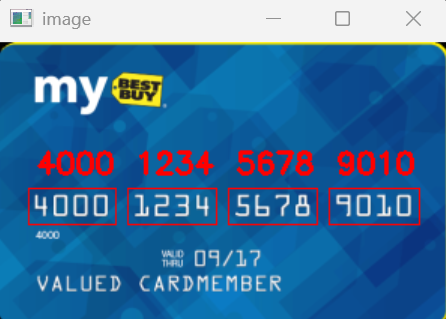
6.遍历轮廓中各个数字
三个循环:
- 第一个循环是遍历找到的每个数字组
- 第二个循环,遍历组内的每个数字
- 第三个循环是与0-9模板逐一匹配
output=[]
# 遍历每一个轮廓中的数字
for (gx,gy,gw,gh) in locs:
groupoutput=[]
group=gray[gy-5:gy+gh+5,gx-5:gx+gw+5]#扩展边界,避免边缘切割
cv_show('group',group)
#预处理
group=cv2.threshold(group,0,255,cv2.THRESH_BINARY | cv2.THRESH_OTSU)[1]#自动二值化
cv_show('group',group)
#计算每一组的轮廓
group_,digitscnts,hierarchy=cv2.findContours(group.copy(),cv2.RETR_EXTERNAL,cv2.CHAIN_APPROX_SIMPLE)#在二值化的每个group中找每个数字的轮廓
digitscnts=myutils.sort_contours(digitscnts,method='left-to-right')[0]#排序
#计算每一组中的每一个数值
for c in digitscnts:
#找到当前数值的轮廓,resize成合适的大小
(x,y,w,h)=cv2.boundingRect(c)
roi=group[y:y+h,x:x+w]#裁剪出单个数字
roi=cv2.resize(roi,(57,88))#统一到模板尺寸
cv_show('roi',roi)
'''—–使用模版匹配,计算匹配的得分'''
scores=[]
#在模版中计算每一个得分
for (digit,digitroi) in digits.items():
#模版匹配
result=cv2.matchTemplate(roi,digitroi,cv2.TM_CCORR)
(_,score,_,_)=cv2.minMaxLoc(result)
scores.append(score)
#得到最合适的数字
groupoutput.append(str(np.argmax(scores)))
#画图
cv2.rectangle(image,(gx-5,gy-5),(gx+gw+5,gy+gh+5),(0,0,255),1)
# cv2.putText()是opencv库中的一个函数,用于在图像上添加文本
cv2.putText(image,''.join(groupoutput),(gx,gy-15),cv2.FONT_HERSHEY_SIMPLEX,0.65,(0,0,255),2)
output.extend(groupoutput)#得到结果,将一个列表的元素添加到另一个列表的末尾
7.打印结果
#打印结果
print('credit card type:{}'.format(FIRST_NUMBER[output[0]]))
print('credit card #:{}'.format(''.join(output)))
cv2.imshow('image',image)
cv2.waitKey(0)


评论前必须登录!
注册