 网硕互联帮助中心
HTTPS 负载均衡 访问同一服务器上两个 FastAPI 程序
-
-
- **一、架构说明**
- **二、配置 HTTPS 负载均衡**
-
- **1. 获取 SSL 证书(以 Let's Encrypt 为例)**
- **2. 配置 Nginx HTTPS 反向代理与负载均衡**
- **3. 重载 Nginx 配置**
- **三、验证 HTTPS 负载均衡**
-
- **1. 测试请求分发**
- **2. 查看 Nginx 日志**
- **3. 检查 SSL 证书有效性**
- **四、高级配置**
-
- **1. 基于路径的路由分发**
- **2. 健康检查(主动模式)**
- **3. 会话保持(Session Persistence)**
- **五、故障排查**
- **六、自动化部署(参考脚本)**
-
以下是配置 HTTPS 负载均衡 访问同一服务器上两个 FastAPI 程序的详细步骤,涵盖 Nginx 配置、SSL 证书申请 及 负载均衡策略:
一、架构说明
• 服务器环境:单台服务器运行两个 FastAPI 程序,分别监听 127.0.0.1:8000 和 127.0.0.1:8001。 • Nginx 角色: • 作为 HTTPS 终止点(处理 SSL 加密)。 • 通过反向代理将请求负载均衡到两个 FastAPI 应用。
二、配置 HTTPS 负载均衡
1. 获取 SSL 证书(以 Let’s Encrypt 为例)
# 安装 Certbot
sudo apt install certbot python3-certbot-nginx
# 申请证书(替换为您的域名)
sudo certbot certonly –standalone -d example.com
证书路径: • 公钥:/etc/letsencrypt/live/example.com/fullchain.pem • 私钥:/etc/letsencrypt/live/example.com/privkey.pem
2. 配置 Nginx HTTPS 反向代理与负载均衡
# /etc/nginx/conf.d/fastapi-ssl.conf
# HTTP 重定向到 HTTPS
server {
listen 80;
server_name example.com;
return 301 https://$host$request_uri;
}
# HTTPS 主配置
server {
listen 443 ssl;
server_name example.com;
# SSL 证书配置
ssl_certificate /etc/letsencrypt/live/example.com/fullchain.pem;
ssl_certificate_key /etc/letsencrypt/live/example.com/privkey.pem;
ssl_protocols TLSv1.2 TLSv1.3;
ssl_ciphers ECDHE-ECDSA-AES128-GCM-SHA256:ECDHE-RSA-AES128-GCM-SHA256;
ssl_prefer_server_ciphers on;
# 负载均衡配置
upstream fastapi_backend {
# 权重分配(可选)
server 127.0.0.1:8000 weight=3; # 应用1,权重 3
server 127.0.0.1:8001 weight=1; # 应用2,权重 1
}
# 反向代理规则
location / {
proxy_pass http://fastapi_backend;
proxy_set_header Host $host;
proxy_set_header X-Real-IP $remote_addr;
proxy_set_header X-Forwarded-Proto $scheme; # 传递 HTTPS 协议信息
# WebSocket 支持(若 FastAPI 使用 WebSocket)
proxy_http_version 1.1;
proxy_set_header Upgrade $http_upgrade;
proxy_set_header Connection "upgrade";
}
# 健康检查端点(可选)
location /health {
proxy_pass http://fastapi_backend/health;
proxy_set_header Host $host;
}
}
3. 重载 Nginx 配置
sudo nginx -t && sudo systemctl reload nginx
三、验证 HTTPS 负载均衡
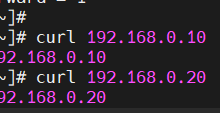
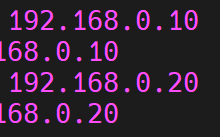
1. 测试请求分发
# 模拟 10 次请求,观察流量分配
for i in {1..10}; do
curl -k https://example.com
done
• 预期结果:约 75% 请求到 8000 端口,25% 到 8001 端口。
2. 查看 Nginx 日志
tail -f /var/log/nginx/access.log | awk '{print $upstream_addr}'
• 输出示例:
127.0.0.1:8000
127.0.0.1:8000
127.0.0.1:8001
…
3. 检查 SSL 证书有效性
# 使用 OpenSSL 验证
openssl s_client -connect example.com:443 -servername example.com
• 确认输出中显示 Verify return code: 0 (ok)。
四、高级配置
1. 基于路径的路由分发
若需按 URL 路径区分应用(如 /app1 和 /app2):
server {
listen 443 ssl;
server_name example.com;
# … SSL 配置同上 …
# 路由到应用1
location /app1/ {
proxy_pass http://127.0.0.1:8000/;
}
# 路由到应用2
location /app2/ {
proxy_pass http://127.0.0.1:8001/;
}
}
2. 健康检查(主动模式)
使用第三方模块或 Nginx Plus:
upstream fastapi_backend {
server 127.0.0.1:8000;
server 127.0.0.1:8001;
check interval=3000 rise=2 fall=3 timeout=1000 type=http;
check_http_send "HEAD /health HTTP/1.1\\r\\nHost: example.com\\r\\n\\r\\n";
check_http_expect_alive http_2xx http_3xx;
}
3. 会话保持(Session Persistence)
使用 ip_hash 或 sticky 模块:
upstream fastapi_backend {
ip_hash; # 同一客户端 IP 固定访问同一后端
server 127.0.0.1:8000;
server 127.0.0.1:8001;
}
五、故障排查
| SSL_ERROR_BAD_CERT_DOMAIN | 确保证书域名与访问域名一致,或使用通配符证书 (*.example.com) |
| 502 Bad Gateway | 检查 FastAPI 应用是否运行,Nginx 错误日志 /var/log/nginx/error.log |
| 流量未按权重分配 | 确认后端服务器健康状态,检查 weight 参数是否生效 |
六、自动化部署(参考脚本)
#!/bin/bash
# 自动更新证书并重载 Nginx
certbot renew –quiet
systemctl reload nginx


评论前必须登录!
注册